Bondtech

/

News

Bondtech's Blog with News, Product launches, Tips and Tricks, and more

Bondtech

/

News

Bondtech's Blog with News, Product launches, Tips and Tricks, and more

Bondtech

/

News

Bondtech's Blog with News, Product launches, Tips and Tricks, and more

Events

Learn

News

Team

Products

Sharing

Stories

STORIES

Turning Lemons into Lemonade Chapter two

After improving our Main Shaft Assembly, we now have the new BMG Reverse Integrated Drive Gear Assembly.

NEWS

Bondtech Shipping – Fast, cheaper, more options

Our newly signed UPS agreement will provide our customers with a wider variety of shipping options, with speedy and cheaper delivery.

LEARN

The Bondtech CHT BiMetal Nozzles

Bondtech CHT BiMetal nozzles address the challenges of printing with abrasive materials. Its unique combination of materials, including a copper body and vanadium steel inserts, [...]

LEARN

Use this torque wrench to prevent breaking the BiMetal CHT Nozzles

The story of how we designed and manufactured a custom-made wrench that provides the perfect torque balance to tighten BiMetal CHT nozzles.

STORIES

Turning Lemons into Lemonade

we are thrilled to announce that we are launching an improved white Main Gear, now made of a new white technical thermoplastic, that reduces the [...]

Trash it or Read it. Just never miss what is important to you.

Join us in this journey and subscribe to our newsletter to get the latest insights right in your mailbox.

Latest Posts of the Bondtech Blog

Bondtech Powers Q5D’s CU500

A disruptive multi tool

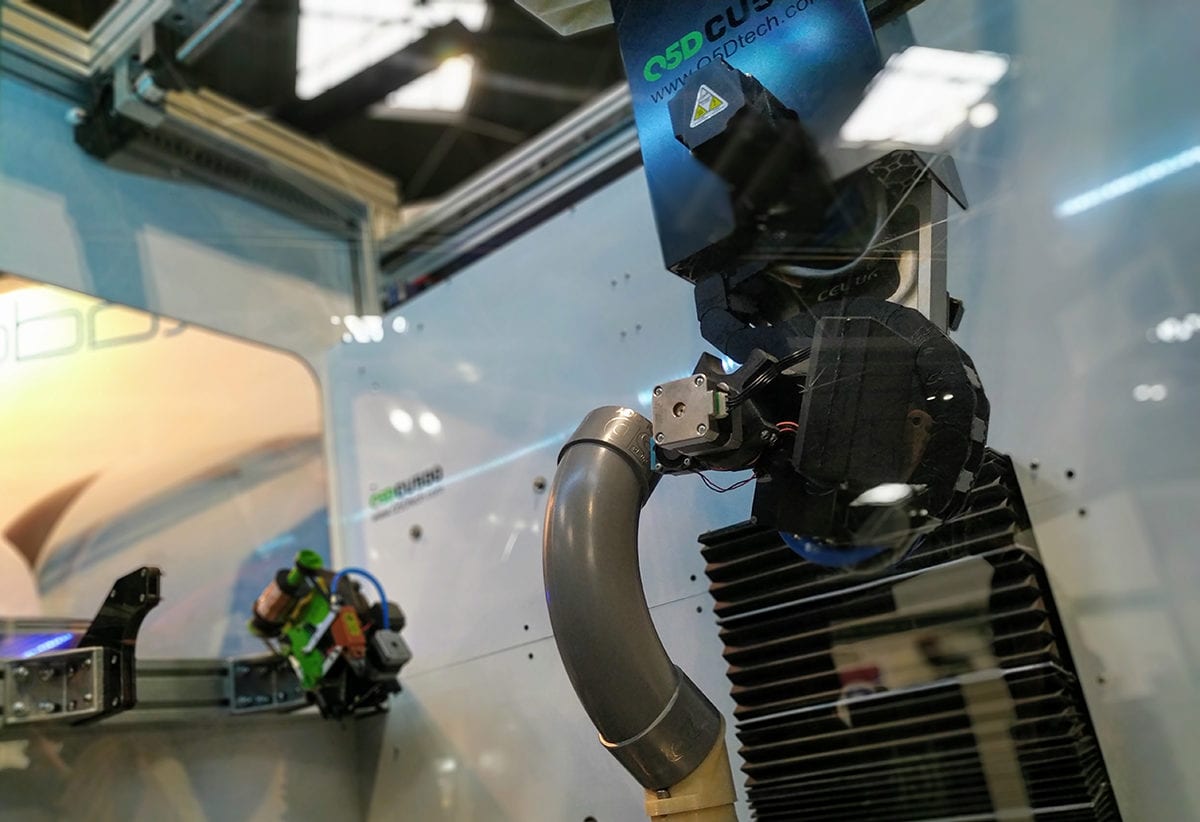
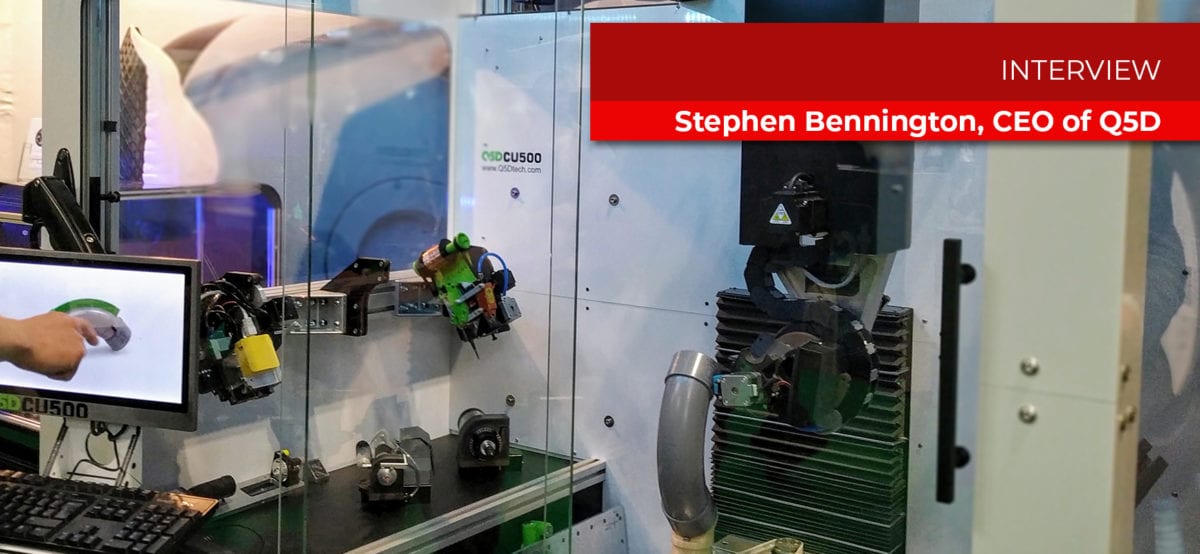
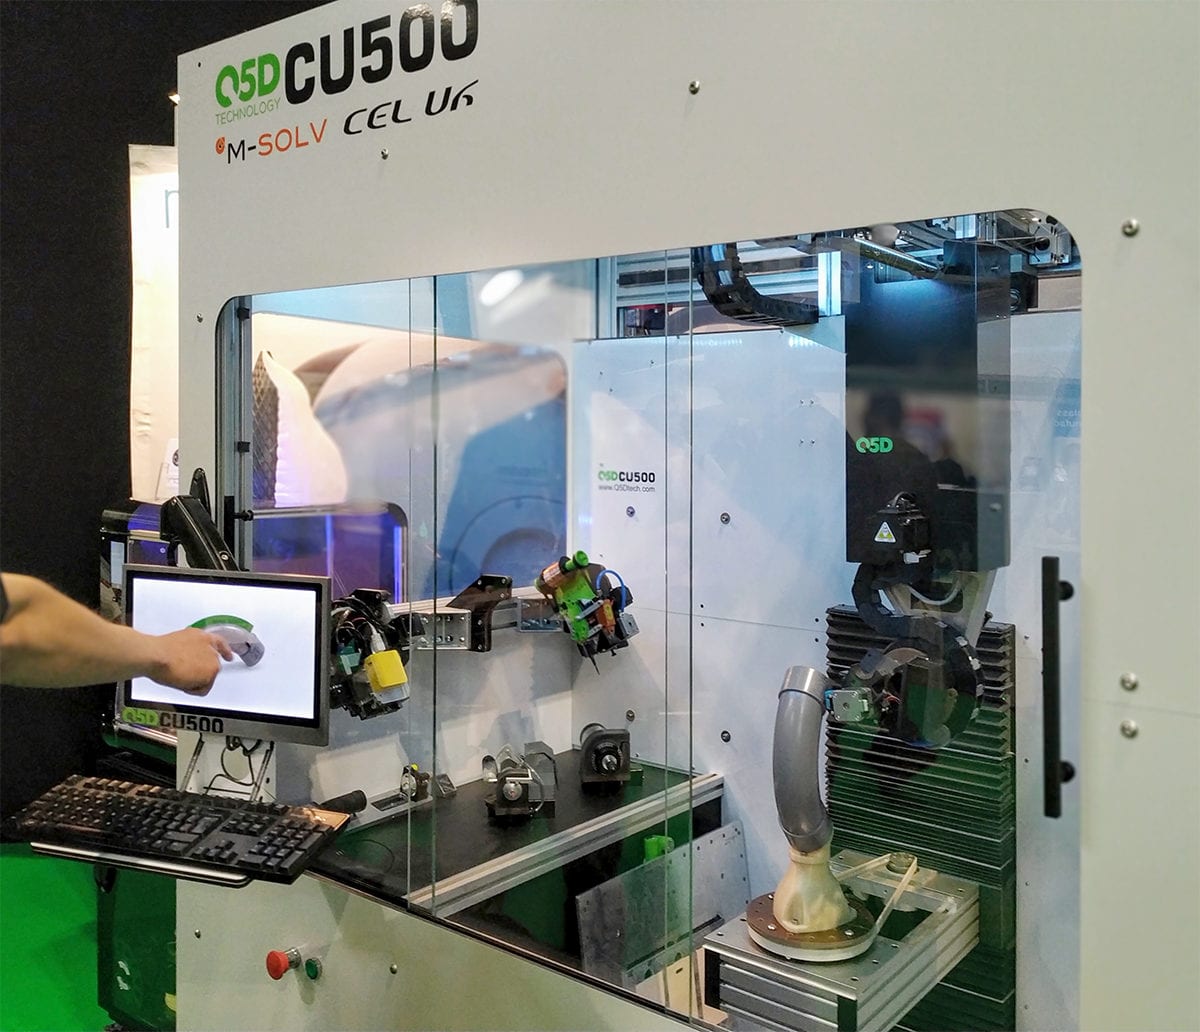
The first time we saw the 5-axis CU500 was during TCT Show in Birmingham, last September. It was a very big and cool machine, equipped with more tools than a swiss army knife. The outer shell was sturdy and featured several wide open windows that allowed visitors to see inside. It was printing pipe fittings with no need for supports, by moving the printhead in unconventional ways. Plus, it was using Bondtech QR extruders. We had to know more about it, and about the great company behind this invention. We didn’t had the chance top speak with Stephen then but we got in contact later. Here is the written interview with Stephen Bennington, CEO of Q5D.

Stephen, for those who don’t know Q5Dtech, let us know a bit more about your company?

Q5D Technologies is a Joint Venture between two UK companies, CEL-UK a manufacturer of the award winning Robox® branded 3D-printers and M-Solv a manufacturer of laser materials processing and printed electronics tools for touchscreen and other markets.

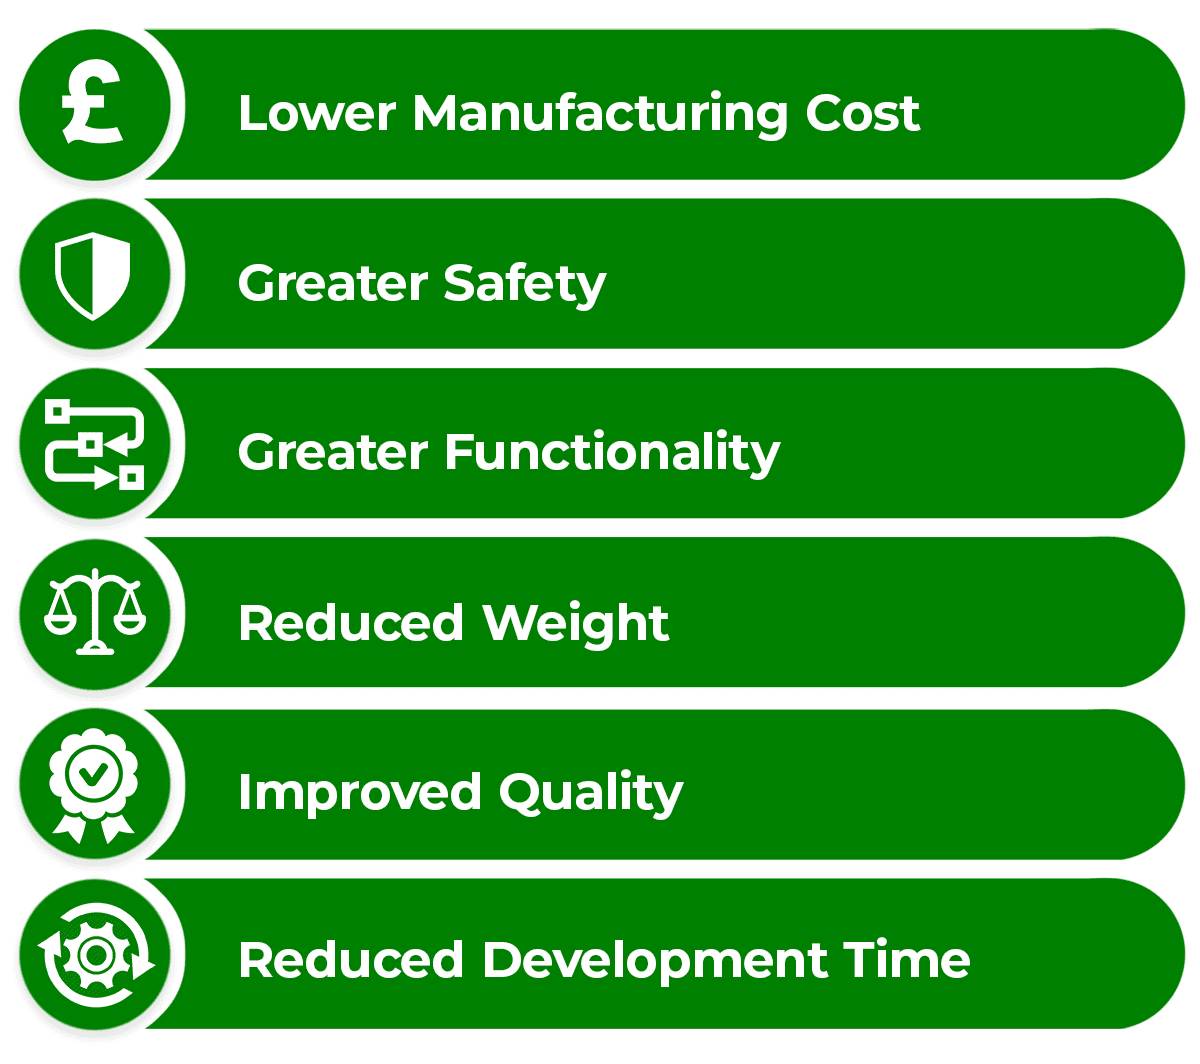
Q5D designs and supplies machine tools to automate the production of wiring harnesses. These are used in industries from white goods to automotive and aerospace. Q5D’s technology results in harnesses with higher quality but lower cost.

This technology is highly disruptive to the complex supply chains that exist in many of these industries, particularly if the machines are incorporated into just-in-time manufacturing at the OEMs.

“Q5D’s technology results in harnesses with higher quality but lower cost.”

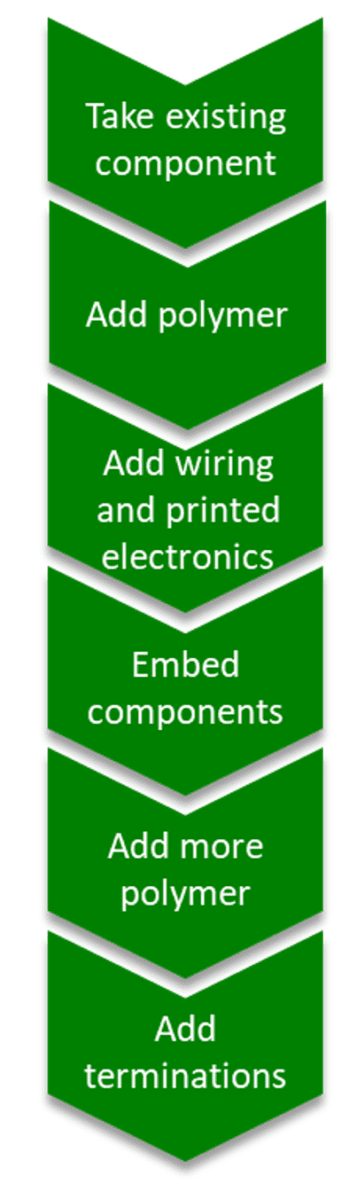
The robotic tool combines, additive manufacture with printed electronics and embedded wiring to automate the manufacture of wiring harnesses. It does this by embedding the wiring into the component. More can be seen in the company video.

The robotic tool consists of a 5-axis platform with a multiple end-effectors and an autochanger that can swap between end-effectors.

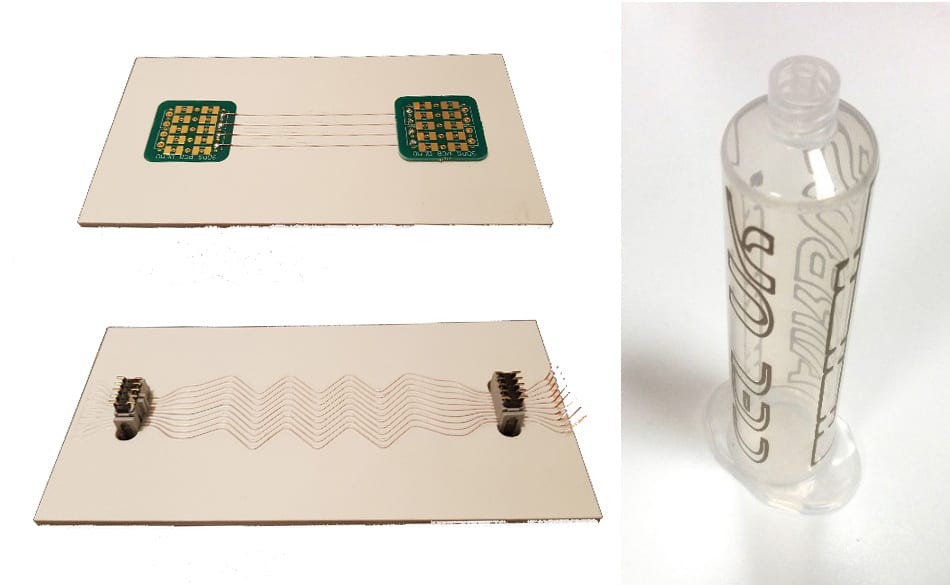
By using a combination of FFF-type additive manufacture, printed electronics and embedded wiring and terminations the tool can create a functionalised component or functionalise an existing component.

“The robotic tool consists of a 5-axis platform with a multiple end-effectors and an autochanger that can swap between end-effectors. “
Platform and end-effectors
  • 5-axis platform (An R&D product is already available)
  • Choice of end effectors:
    • FFF printer head (available)
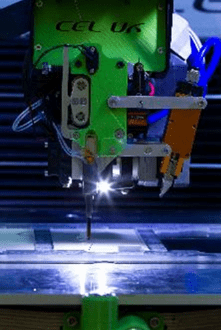
    • Conductive paste extrusion (available)
    • Conductive paste jetting (available)
    • Bare copper wire embedding (available)
    • Milling head (available)
    • Fibre-optic embedding head (2020)
    • High temperature FFF print head (2020)
    • Abrasive materials FFF print head (2020)
    • Multi-core/ screened cable embedding (2020)
    • Laser sintering printed electronics (2020)
    • Terminations (2020)
    • Pick & Place (2020)

When CEL-UK started to sell the Robox® 3D printers there was a lot of excitement in the press and there was the expectation that everyone would have a printer in their homes, in much the same way they might have a printer for their computer. Although the Robox® printers sold well, particularly into the education sector, the market never quite developed as expected and it soon became clear that 3D-printing was becoming an engineering tool, and the FFF-type printers that CEL-UK were expert in, where best suited to prototyping, making jigs and fixtures and short manufacturing runs where tooling costs made other manufacturing techniques uneconomic.

When CEL-UK began to look at incorporating conducting elements into the print it quickly became clear that this was an area in which additive manufacturing could compete directly with existing manufacturing methods. Wiring harnesses are still largely made by hand, which is slow, costly and prone to error. Although there has been some progress in recent years to try and automate parts of this process, the final layout is still done with a pin-board.

Once CEL-UK decided that it was going to use printed electronics as well as embedded copper wire to add conducting elements then the design of the new system started take shape.

“…incorporating conducting elements into the print … was an area in which additive manufacturing could compete directly with existing manufacturing methods.”

Firstly: it became necessary to use a 5-axis platform as this was the obvious way to create the smooth compound surfaces onto which you could print the electronics directly.

Secondly: the flexibility that 5-axis platform brings makes it possible to print directly onto existing components. Using the Q5D tools to functionalize an existing part that is made by injection molding or metal pressing is faster and more cost effective for a mass-produced part.

One problem remained; all the existing printed electronics technologies use silver paste. Whilst this works well, it requires a curing stage where the part needs to be baked in an oven. This makes it necessary to dismount the part from the Q5D tool part way through the manufacture.

“…the flexibility that 5-axis platform brings makes it possible to print directly onto existing components. “

Chris Elsworthy the CEO of CEL-UK found the ideal solution to this problem at a meeting of the Bessemer Society a group of people who run high-tech manufacturing businesses in the UK, he was introduced to Phil Rumsby the CEO of M-Solv. M-Solv had developed a technology that used lasers to cure and sinter copper paste, not only is copper paste much less expensive than silver, it removed the need to use an external oven. They determined to join forces and together set-up Q5D.

With so much new technology to bring together in a short period of time the engineers at CEL-UK did not want to have to worry about the extruder. They needed something that was going to have excellent performance but be reliable and cost effective. They were familiar with the technologies used by Bondtech and they needed the high gear ratio to precisely control the extrusion, combined with dual pinch wheels on the filament feed.

“…needed something that was going to have excellent performance but be reliable and cost effective”

Q5D is already selling the CU500 tool, which is aimed at those who have complex wiring problems they cannot manufacture with existing technologies. It consists of the 5-axis platform and an automatic end-effector changer that can select up to three different heads at any one time.

“Q5D is working with various aerospace and automotive companies to improve the machine”

Q5D is working with various aerospace and automotive companies to improve the machine:

Software
The software will be based on Siemens NX software. This will make it possible to take a CAD design and create tools paths that enable the object to be created.

End-effectors
Laser sintered-copper end-effector: Printed electronics typically uses silver paste. However, this is expensive, and the performance is adequate rather than good. Although much less expensive, the tenacious oxide layer means that copper pastes perform very poorly. However, M-Solv have developed IP which enables them to use a laser to sinter the copper paste without melting the underlying substrate. The resultant porous solid has a performance equal to or better than the silver at a fraction of the cost.

Aerospace FFF end-effectors: Many of the thermoplastics used in aerospace applications melt at high temperatures (ETFE 330°C, PEEK 343°C, PPS 280°C, PTFE 327°C) so head and build environment that can process polymer at temperature of up to 400°C is necessary.

Structural polymers are often loaded with other materials, such as chopped inorganic fibres for strength (such as glass, ceramic or carbon fibres) or with other materials to reduce permeability or increase conductivity. These materials rapidly erode metal nozzles. CEL-UK have developed an extruder with an abrasion resistant ruby nozzle.

Termination end-effectors: By using a combination of mechanical bonding and laser welding and soldering, Q5D is developing heads to add terminations of different types.

Pick-and-place end-effector: This will provide the ability to add automate the addition of passive and active electronics components. This will be ready in in 2020

Images Gallery
Thank you Stephen for your contribution!

Bondtech would like to thank Stephen Bennington, not only for this interview but also for the work done at Q5D and for the integration of Bondtech technology in such disruptive manufacturing machine.

We would like to finish this post by highlighting the main advantages Q5D claims for usingthe CU500 >
Click here to know more about Q5D

Tweaking Bondtech Customer eXperience


Actions For November 2019

We always have our Customers in mind when we develop our business. During November, we will put some extra effort on improving your eXperience. We will focus on some key points of interaction.

This post will be updated each time a new action is concluded. We will appreciate your feedback.

Thanks : )


We plan to work on the following points:

  • Tweak Website Navigation;
  • Publish eXtra Guiding Content;
  • Design New Product Packaging;
  • Focus on BCX in Product Development;
  • Improve Support Communication;
  • Faster and Greener Logistics.


Website Navigation & UI

We received some feedback telling us some important contents are hard to find in our website. To improve your access to the contents we will teak our navigation and User Interface to make it simpler.


Guiding Content

We noticed some customers face issues with their 3D printers and our products, especially due to easily preventable errors. We will provide more content to guide you through how to get the best out of your upgraded 3D printer.


New Product Packaging

Our packaging is 4 years old already. We want to update it to reflect the quality of our products and to use it as an extra step to deepen our relationship with our customers.


Focus on BCX

Bondtech extruder and upgrade kits are what may be called a technical product. Some skills are required to install it and put it to good use. November sets the starting moment when Product Development will put BCX on the top of our priorities.


Support Communication

Our world wide spread customers speak many languages and have many different degrees of mechanics and electronics knowledge. We will introduce a tool to ease and facilitate better communication and understanding during support.


Greener Logistics

Our products and parts move from Sweden to everywhere else in the world. We are working on ways to decrease those miles our products travel to reach you, especially the spare parts. You will wait less for them and make Greta Thunberg happy.


Want to know more?

Register yourself or login to leave a Question, Reply or Comment in the section below.

If you didn't already, you can also subscribe to our newsletter to receive the short updates about our new products, updates or technology on your mailbox.

Thank you : )

Dual Drive Technology’s Next Level


A Surprising Glimpse Into The Future

Multiple projects are simultaneously under development here at Bondtech. Sometimes it’s hard to keep track, but this one on Martin Bondéus’ desk caught my attention. I asked about it, and can share with you what I’ve heard.


What’s that Martin? What are you working on?

You mean this extruder block here? This is an idea we’ve been developing to deliver our next generation Dual Drive Technology. We are taking Dual Drive from ground to sky level and working to put it out for test-drive until the end of current year.

Will it include an hotend?

We believe in open solutions and we’ll keep on doing so. As usual with Bondtech extruders, it will be an open solution that will allow for combination with several hotends through single or multiple versions. This keeps customer options open, as they should be.
We don’t force vegetables on who may also like meat.

How will we sell it?

It will be supplied as a combo kit, with a pancake stepper motor and an ultra-compact extruder. The extruder is smaller than the stepper and its fine-tuned settings allow for ease of installation and ease of use to everyone.
It’s our next hero, and when the hero arrives,
the Hero saves the day!


Want to know more?

Register yourself or login to leave a Question or Reply in the Comments section below.

If you didn’t already, you can also subscribe to our newsletter to receive a mash-up of our latest posts and other Bondtech updates in your mailbox.

Thank you : )


The CoreXYUVAB 3D Printer


A mad genius creation

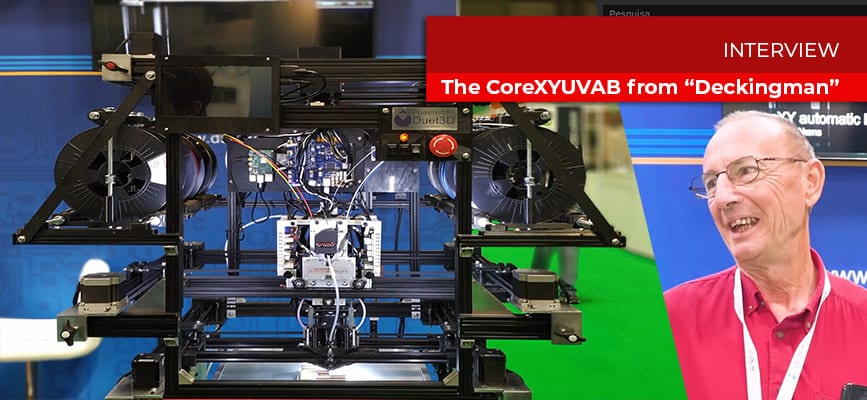
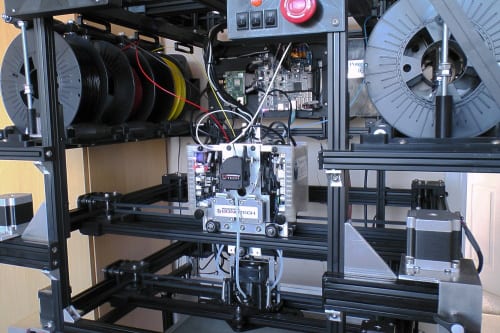
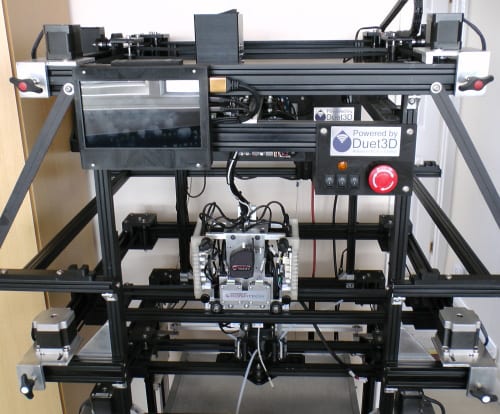
The first time we saw the CoreXYUVAB 3D printer was at the TCT Show in Birmingham, last September. It was one of the most cool, quirky, and amazing 3D printers we have ever seen. The structure was made with extruded profile aluminum. Very open, fragile somehow, but incredibly stable. Plus, it was using 5 Bondtech Mini Geared extruders. We had to know more about it, and about the mad genius behind this creation. We spoke briefly with Ian at the show but decided to engage in a longer conversation later. Here is the written interview with “Deckingman”.


I’ve always had an interesting in making things. After leaving school back in 1969 at the tender age of 16, I started a five year apprenticeship with a company called ERA which was the R&D arm of Zenith/Solex carburettors. I spent the first 2 years in the tool room where I learnt to use lathes, milling machines, centre grinders and so forth (there were no CNC machines in those days).

For the next 3 years I spent some time in all the other departments finishing my apprenticeship as an engine tester. After a brief time testing gas turbines for Rolls Royce, I joined a company who’s business was engine tuning and I became a specialist in the diagnostics and fault finding of electronic engine management systems. After that, I joined Aston Martin Tickford as a senior technician and progressed through project engineer, project manager, emission facility manager and ending up as operations manager (which I hated).

In around 1995, I left there and started my own engineering consultancy business specialising in commissioning of vehicle emission facilities and training of personnel to run those facilities. Most of this work was for large companies such as Ford Motor Co, Jaguar, Esso, Shell, Burmah Castrol, Land Rover etc. This work lasted for about 7 years but eventually, all those facilities were commissioned and the personnel had been trained and so that work came to an end.

“I became a specialist in the diagnostics and fault finding of electronic engine management systems.”

So in 2002 I had a complete change of career and started another business designing and building garden decks because I have always liked working with wood which was one of my many hobbies. I ran that business until 2018 when I reached the age of 65 and the physical effort was becoming too much so I retired. Last year I bought a small lathe and milling machine so that I could make parts for my printer from metal.

This takes my right back to when I started my apprenticeship almost 50 years ago and I was pleased to discover that I hadn’t forgotten the skills I learnt back then.

My interest in 3D printing started in about 2012 when I bought my first 3D printer which was a RepRap Pro Mendel 3. Shortly afterwards I upgraded it to a tri-colour version and shortly after that I changed the 3 nozzles for a single nozzle Diamond 3 colour. Around that time, I started to participate in various forums and had to think of a user name.

At that time, I was still running my decking business and potential customers would ring me up and say “is that the decking man”. So I chose the user name “deckingman”. Since then I have started my own blog and YouTube channel but the name “deckingman” seems to have stuck – even though I no longer design and build garden decks.


The printer is fundamentally 3 independent CoreXY gantries stacked one above the other.

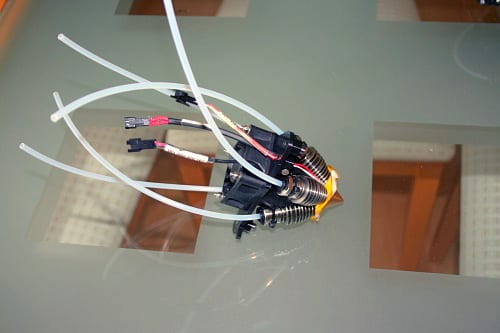
The first CoreXY gantry carries a Diamond 5 colour hot end.

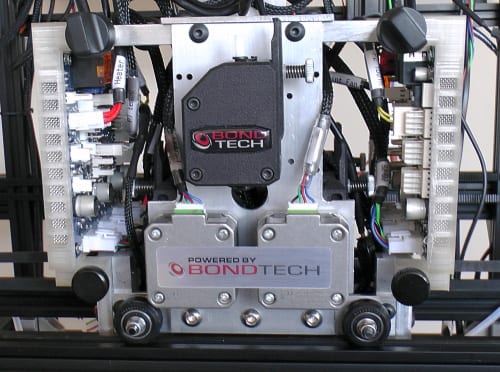
The second CoreXY gantry carries 6 Bondtech BMG extruders of which only 5 are currently in use.These feed filament into the Diamond hot end via short Bowden tubes but otherwise there is no mechanical connection between the two and each could move independently of the other.

The third CoreXY gantry carries nothing more than lumps of lead. This is a load balancing/force cancelling gantry. This gantry is also independent but moves in the exact opposite directions of the other two.

For “normal” printing all the motors are mapped to a single XY gantry. That is to say, the firmware considers it to be a simple CoreXY which happens to have 3 Alpha motors and 3 Beta motors. Each driver chip receives exactly the same signal but the motor directions are reversed for the upper gantry.

When the printer is turned off, with no holding current supplied to the stepper motors, it is possible that one or more gantries could be physically moved out of position in relation to the other gantries. If a print was started in this situation, then the gantry that is out of position could collide with the printer frame. For this reason, it is necessary to establish the home position of each gantry independently.

“The XY and UV gantries home to the front left hand corner, the load balancing AB gantry homes to the rear right corner.”

The initial homing is done by moving the lower two gantries together until one or other end stop switch triggers. At this point, the motors are re-mapped so that the gantries are treated as 3 independent gantries. The lower gantry is still the XY gantry but when homing it only has a single Alpha motor and a single Beta motor. The gantry carrying the extruders then becomes the UV gantry with it’s own motors and end stop switches. Finally, the load balancing becomes the AB gantry, also with it’s own motors and switches. So when homing, it is a 7 axis machine (XY, UV, AB and Z). The XY and UV gantries home to the front left hand corner, the load balancing AB gantry homes to the rear right corner. Once homing has been completed, the motors are re-mapped and the machine resorts to being a single CoreXY with 3 Alpha motors and 3 Beta motors.


In truth, I didn’t design the machine to be the way it is now from the very start. It has evolved into what it is now and will likely continue to evolve.

My very first printer was a Mendel, sold as a kit by RepRap Pro, a company started by Dr Adrian Bowyer who started the RepRap movement. I soon became interested in printing objects with multiple colours and purchased the tri-colour upgrade kit to convert it to a 3 colour printer. I soon became disillusioned because of the problems I had trying to get al 3 nozzles at exactly the same height, and also the problems I had with filament “oozing” from unused nozzles. Then I came across the Diamond hot end by RepRep.me which uses a single nozzle with 3 inputs. This excited me very much because it was also claimed that it could mix filaments. So for example Blue and Yellow can be mixed to produce Green. So I purchased a Diamond hot and converted the machine to use that instead of the 3 separate nozzles.

I should probably add that up until this point I had never used any sort of CAD package and I’m not designer by training. But I had written some code for things like Arduinos, just as a hobbyist. So having tried a few free CAD type packages, I settled on OpenScad as this suited me better. I am by no means an expert but I have taught myself enough to design the parts that I need.

Using a Diamond hot end or the three separate nozzles took up a lot of travel in the X direction. The Mendel only had about 200 to start with but this came down to something like 150mm. So I needed something bigger. Also, the engineer in me could see many faults with the Mendel and many areas where it could be improved.

“So I purchased a Diamond hot and converted the machine to use that instead of the 3 separate nozzles.”

So I decided to design and build my own printer which would be bigger and more rigid. From the outset I wanted to use a Diamond “mixing” hot end which, because of the way the heat sinks are fitted at an angle of about 20 degrees makes a wide hot end. I also decided that 350 to 400 mm of travel on X and Y would be good. Because the Diamond hot end is also relatively heavy, I also decided that the best way to mount it would be to have it fixed between two parallel rails. So it soon became apparent that the frame would need to be 600mm square to accommodate that range of movement. I decided to use OpenBulds V slot extrusion for the frame because any member can also be a linear guide. At that time, I didn’t have the capability to cut extrusion to the precise lengths that I would need, nor make the cut ends square. So I had to purchase the extrusion cut to length. At that time, the pricing structure was such that if one wanted say 600mm, one had to buy a 1 metre length and also pay for it to be cut. As the 400mm off cut wouldn’t be any use I decided that I might as well make the printer 1 metre tall, as it would actually have cost more to make it 600mm tall.

Having decided the overall dimensions, I then needed to decide what kinematic mechanism to use. After doing some research, I settled on CoreXYas being the most elegant with the bed only moving in the Z direction. The bed itself needed to be both flat and rigid. I also like having a removable print surface because it enables me quickly start another print without waiting for the previous one to cool. So the print bed is 400mm x 400mm aluminium tooling plate 10mm thick, topped with 6mm of float glass, fitted with an 800 Watt mains powered silicone heater, with 2 layers of insulation underneath. It is supported on 3 off 1mm pitch single start lead screws, driven by a single motor and continuous belt and prevented from moving in X or Y by two linear guides at opposite corners. It is both flat and level and needs no form of software compensation.

“Then I upgraded from a 3 colour Diamond hot end to a 5 colour … This is when it became a CoreXYUV.”

My final decision was where to mount the extruders and filament reels. I realised that if the extruders were mounted on the frame, I would need Bowden tubes that were about 1 metre long which ultimately is never going to work well. My first design was to have the extruders suspended above the hot end using a pulley and counter weight. This wasn’t too successful so I then changed itby mounting the extrudes on a second gantry. Initially this had no motors or belts and was dragged around via cords attached to the hot end. This was better but still not great. Then I upgraded from a 3 colour Diamond hot end to a 5 colour. This meant having 5 extruders which means a bigger carriage and is also even more mass to “drag” around. So that gantry had to be made wider and at the same time, I decided to make it powered by it’s own motors. This is when it became a CoreXYUV.

The final major change before upgrading to Duet generation 3, was because the printer normally stands on a wooden floor, when running at high speed the entire frame rocks due to the high moving mass and also the high centre of gravity. This is where I made a mistake in thinking that this must be having an adverse effect on print quality. What I should have done was to print something tall and at high speed to evaluate the adverse effects. But I didn’t. Instead I went ahead and added a third gantry which does the opposite of the other two gantries to cancel out the forces and stabilise the printer. This is when it became a CoreXYUVAB. To install that gantry I had to move the filament spools from the top of the machine to the sides which has made the machine wider.

I works very well and even when I am printing at 300mm/sec by utilising the 5 melt chambers concurrently, the printer is solid and does not rock any more. Unfortunately, when I finally did a test print of a tall object at high speed, without the load balancing gantry, there were no ill effects on the quality of that print. The entire printer rocks and is alarming to watch, but the print itself is fine. So in that respect, the AB gantry is a solution to a problem which does not exist. But it does stabilise the printer and having already spent the time and money to make it, there is nothing to gain by removing it. Perhaps if the frame wasn’t so rigid, then I might had seen some artefacts and perhaps by making the printer more stable, I might have reduced stresses on joints which might be beneficial in the long term.


Mixing hot ends such as the Diamond, have some unique usage requirements compared to more conventional hot ends. Firstly, filament must be loaded into all inputs at all times. Otherwise, molten filament will get pushed back up into any unused inputs, where it will cool and solidify in the heat sink and cause a blockage. By the same token, when retracting filament for non-print moves to prevent any “oozing”, all filaments have to be retracted, – not just those that are being used for that part of the print. If only one filament is retracted, then all that happens is that molten filament is pulled from the other inputs, rather than the nozzle tip.

Now one of the things I like to do is to mix filament and change the mixing ratio every layer or every 2 or 3 layers so that the colour gradually changes over the height of the object. For example, I might start with 100% blue for the first layer. Then on the next layer, change the mixing ratio so that it uses 99% blue and 1% yellow. The next layer would use 98% blue and 2% yellow etc. So after 100 layers the colour changes from blue, through green to yellow. Once I reach 100% yellow, then I might start to mix yellow with red so over the next 100 layers the colour changes from yellow through orange to red. This could then be repeated with other filament combinations so it’s quite possible that one or more filaments may not be used for the first few hundred layers of a print. And if the object is complicated, there may be many retract and un-retract cycles within each layer. So it is quite possible that a single piece of filament may undergo thousands of retract and un-retract cycles before it comes in to use.

“this repetitive action of retracting and un-retracting the same piece of filament will eventually wear the filament down so much that the extruder no longer grips it … With the Bondtech BMGs there was no problem even after 23,000 cycles.”

With “conventional” extruders which use a sprung roller pressing against the filament, this repetitive action of retracting and un-retracting the same piece of filament will eventually wear the filament down so much that the extruder no longer grips it. Or in extreme cases, it can completely grind right through the filament. So when the time comes that this filament is needed, the extruder cannot push it into the hot end and the print fails. With the Bondtech BMGs, this grinding away of the filament does not happen.

I did do a back to back tests comparing the Bondtech BMGs with the extruders that I was using at the time. Idocumented it all in my blog so I won’t name them here, but they were a well known make. Even with the spring tension set as light as possible, the other make ground completely through the filament at between 7,000 and 8,000 cycles. With the Bondtech BMGs there was no problem even after 23,000 cycles. At the time I was using 5 extruders and I changed all 5 to Bondtech BMGs.The other thing that struck me was just how easy it is to fit the BMGs compared to the other make which had many more parts. Again, I wrote a little blog post and made a YouTube video of the upgrade process.

Here is the epic “Extreme Retraction Torture Test” video from Ian Pegg

https://www.youtube.com/watch?v=FgqYS1t0PNo


No – I doubt it ever will be because I keep getting ideas of things that I’d like to try. I consider my printer to be more a test bed for ideas than a finished product. It’s fair to say that I get more enjoyment from tinkering and experimenting than I do with actually printing things.

Duet generation 3 now gives me the ability to use a Single Board Computer (SBC). I have bought and fitted a Raspberry Pi but at the moment I don’t know anything about RPis or Linux. That’s a winter project in itself. The idea behind having a SBC is that it can be used to serve the web interface, do file management and other tasks, leaving the Duet main board just to run the print. One idea I have is to fit an uninterruptible power supply (UPS). The RPi could interact with the UPS and when it detect that power has failed and it is running on battery power, the RPi could turn off the bed heater (which is mains powered in any case), and turn off lights and other non-essential items, in order to prolong the run time. Then just before the batteries are exhausted the RPi could perform an orderly shut down such that the print could be resumed once mains power is restored.

I could also fit a large HDMI screen and USB or bluetooth keyboard and mouse to the machine. Or a touch screen. Or I have an old laptop that I might somehow “hang” on the printer. There are numerous options.

I’m sure the “Duet community” will also come up with lots of other “pluggins” that might be useful.

Filament monitors might be something else I’ll add. And in the future the Duet team might come up with some different expansion boards that might suit my needs better than the current prototypes I have now.

“…so far, nobody has yet made a true mixing hot end … I have some ideas about how mixing could be achieved.”

But the main thing for me is the hot end. As you know by now, I have an interest in multi-colour printing and currently I use a Diamond hot end. But so far, nobody has yet made a true mixing hot end. The Diamond and all the other “mixing” hot ends that I am aware of simply combine filament but don’t actually mix them together, So what comes out of the nozzle is akin to stripey toothpaste. The effect can be mitigated to some degree by using transparent filament but not every object lends itself to being made transparent.

I have some ideas about how mixing could be achieved. That was the main reason why I bought a small milling machine and lathe when I retired last year. My first prototype taught me some valuable lessons but I had to abandon further work in order to get my printer upgraded and converted to Duet Generation 3. So that my goal is still to design a mixing hot end that will actually mix. Unless someone else comes up with one, in which case, I’’ll just buy it. But right now, there isn’t a hot end that will do what I want so I’ll continue to try and develop one of my own.


Images Gallery


Thank you Ian for all your work!

Bondtech would like to thank Ian Pegg, not only for this amazing interview but also for all the experimenting and knowledge building put on his work, from which we can all learn and get inspired.

Happy tinkering Ian! See you next time : )


Links To Ian Pegg’s Content

You can check-out his blog here:
https://somei3deas.wordpress.com/

You can check-out his Youtube Channel here:

https://www.youtube.com/channel/UCEMXNdKKMLIVwEqPvohKsng/


The BMG is Dead! Long Live the BMG!


“A new generation of BMG™ is about to inherit the throne. The coronation ceremony will be held in the next days. The old BMG™ will remain in the memory of the people as devoted, productive and reliable.
His successor will keep this tradition and work hard to deserve even more praise in the Future.“

: D just kidding, now seriously…


New BMG is the inspection bench


The New Bondtech Mini Geared

… only perfection cannot be improved so we took something excellent and made it even better. Although our BMG™ extruder is the most popular choice amongst our customers, the continuous feedback we got from our community made us think of some small details we could improve upon.

And we did!


Design Features Updated In The New BMG™:


The Motor Gear is now made of Brass

The corrosion resistant material will stop the very low frequency of oxidation issues that happened to the steel gears.

Motor Gear as spare part


The POM Gear attached to the Main Shaft is now Black

This is a pure aesthetical upgrade to mask out the dirt that shows too much on white.

Main Shaft Assembly as spare part


The Push-Fit is now threaded

It can be removed and/or replaced to make it easier to solve clogs without ruining the BMG™‘s housing.


Surfing is much faster here now!

Top of Home Page view

This is now a 3rd Generation website: fresh style; better coding; faster page loading. Overall, more reliability, more performance, and easier to use.

For many month our visitors were noticing that surfing in our waves was not easy. Slow page loading, too deep navigation, and frequent plugin errors were common. We had official confirmation from PageSpeed Insights. Our average PageSpeed rank was 12% for mobile devices and 30% for desktop computers.

With the support of our partners for Web Development, Findson, we were able to set and implement a strategy to drastically improve our previous performance.

Welcome to the new Bondtech website.

PageSpeed wise we are now blasting above 90% for Desktop and around 60% on mobile devices. A much better score, although not perfect yet.

In the months to come we will work on improving our contents and on enlarging our product offer, mainly in the spare parts area. This comes as a request from so many of our customers.

Parallel to this developments, our support platform continues to grow at https://support.bondtech.se/ .

We appreciate all the Community support.

To improve more and more we also count on our community to tip us on improvements and alert us for issues that may occur. We are always open to suggestions. Don’t be shy. Let us know what can we improve.

Thank you.

Meet Us At TCT 2019 Booth F83

TCT Show Entry Hall

Bondtech is confirmed to attend the next TCT Show, in Birmingham – UK, between 24 and 26 September. We will be at booth F83, available to meet our Sales Partners, OEM Partners, Customers and every other visitor.

We will showcase some recent new products and revel a bit about our Roadmap for the Future.

To book a meeting, please email Henrik Engqvist (henrik@bondtech.se) and fine tune a schedule.

If you are visiting the show, don’t forget to pay us a visit.

See you there!

Mosquito Lands On Prusa i3 MK3S

Detailed View

Bondtech is presenting today a new product that was eagerly awaited by the Prusa community for so long. The Bondtech Upgrade Kit for Prusa i3 MK3S and MK2.5S Mosquito fit is finally here.

By re-imagining how a hotend is designed and structured from the ground up, Slice Engineering gave birth to a gem when they created the Mosquito. Seasoned 3D printer users know that with a Mosquito hotend they can access higher resolution and create their envisioned parts with engineering-grade plastics that would be hard to use with other solutions. 

The Prusa i3 MK3S is also a remarkable piece of engineering and ingenuity loved by thousands of owners all over the world. The Prusa legion is big and proud.

Here at Bondtech we have a special and close relationship with Prusa and with the Prusa Community. The interactions are frequent and the respect is mutual. It’s not unexpected then, that we would feel the pressure from those in the community that by wanting to extract even more value from their Prusas, would come to us asking to marry Prusa and Mosquito.

So, for everyone out there waiting for these good news, it’s official…

… the Mosquito has landed.

German 3D Printer Manufacturer CR3D Chooses Bondtech

Photo by Christian Reil

CR3D, a brand from German manufacturer Ingenieurbüro Christian Reil, in Cham, Bavaria, is using BMG and BMGx2 extruders from Bondtech to incorporate in their high performance open compact and closed industrial 3D printers.

Christian shared with us some details from their C1 and I545 models along with the expression of his satisfaction on exclusively using our extruders.

In return we express our satisfaction as well to see our products being used to create high reliability and performance 3D printers by a growing number of exceptional creators and manufacturers.

Check out their website to know more.

Independent Review of DDS for CR-10S on a S5

2 month have passed since we launched the DDS for CR-10S and the interest in this Bondtech upgrade keeps on growing.
The price level is still on everyone’s mind although most people recognize the quality and value brought by our product largely exceeds its cost.a

The 3D Free YouTube channel, brought by Mouss, published recently an independent review of Bondtech DDS for CR-10S running on a Creality3D CR-10 S5. Although Muss is a French Author, the video has both French and English captions.

Interesting detail in the video: second 00:21 shows how Mouss managed the troublesome cable length, Maker’s style : )

You can check the video by clicking here.